Install MS SqlServer on Mac
Table of contents
Prerequisite
You’re using Mac
You should have Docker installed (if not, please check this link to install, and get back)
Choose A Place on your Mac
You can choose anywhere to store a docker-compose file. For example, Go to terminal in MAC and then run below commands:
- mkdir sqlserver — this creates sqlserver folder
- nano docker-compose.yml .This command opens the docker-compose.yml copy the code from Create docker-compose.yml which is located below.
- Saving the docker-compose.yml To save the file, press Control-O. At the filename prompt, press Enter. To exit, press Control-X.
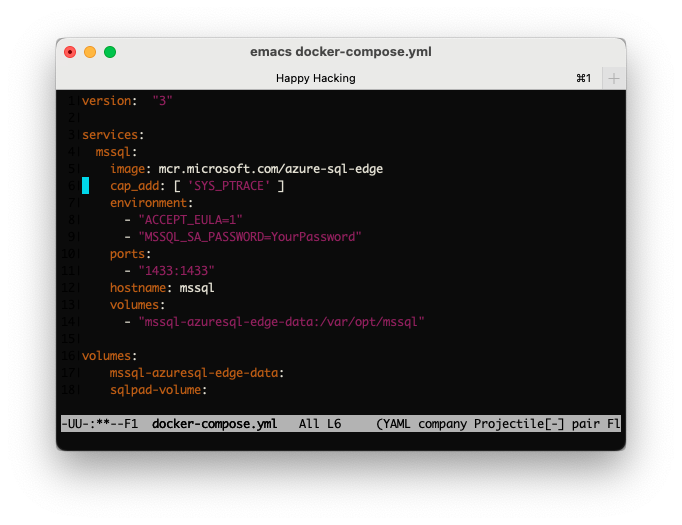
Create docker-compose.yml
Type or copy the following code into it. Please take care of the indents (If you encounter any issue of the syntax of YML, please use this Online YML Checker) to help you.
[Optional] change the password to yours.
version:  "3"

services:
  mssql:
    image: mcr.microsoft.com/azure-sql-edge
    cap_add: [ 'SYS_PTRACE' ]
    environment:
      - ACCEPT_EULA=1
      - MSSQL_SA_PASSWORD=StrongPwd123
    ports:
      - "1433:1433"
    hostname: mssql

volumes:
    mssql-azuresql-edge-data:
Generate your SqlServer Container
Open your terminal and switch to the path as same as your docker-compose.yml file. Type the following command.
docker-compose up
If everything goes well, you would see a similar outputs like me.

Additional Commands
You can press “Ctrl-C” to stop the container. And then you can use “docer-compose start” to start you container in the future.
dockcer-compose start
After you want to stop your container. Please use below command.
dockcer-compose stop
Connect to Sql Server
Prerequisite
Installed Azure Data Studio
A Running Sql Server
Open your Azure Data Studio
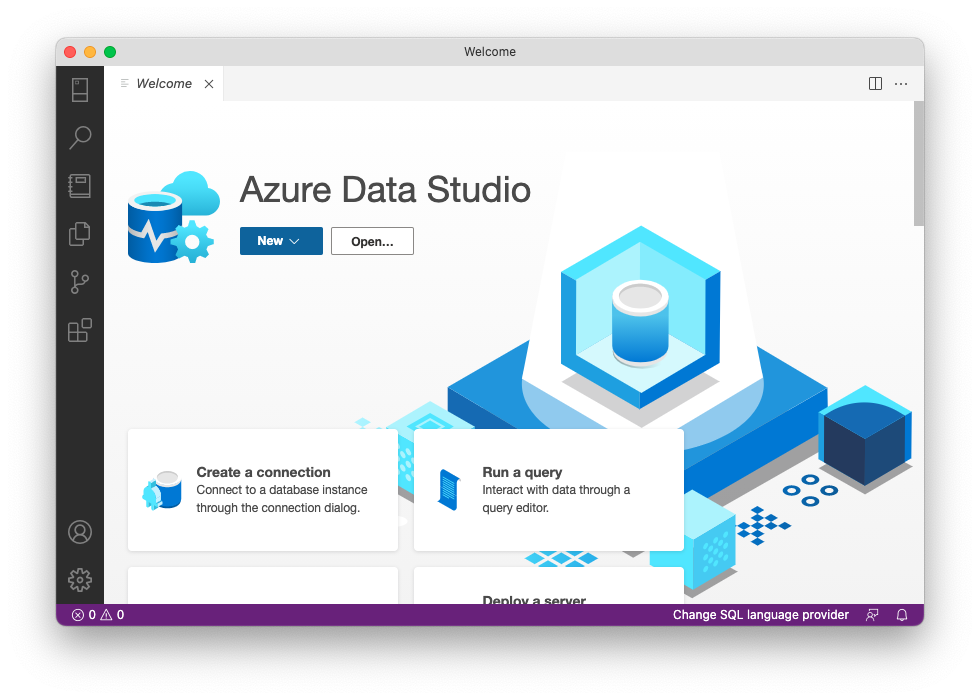
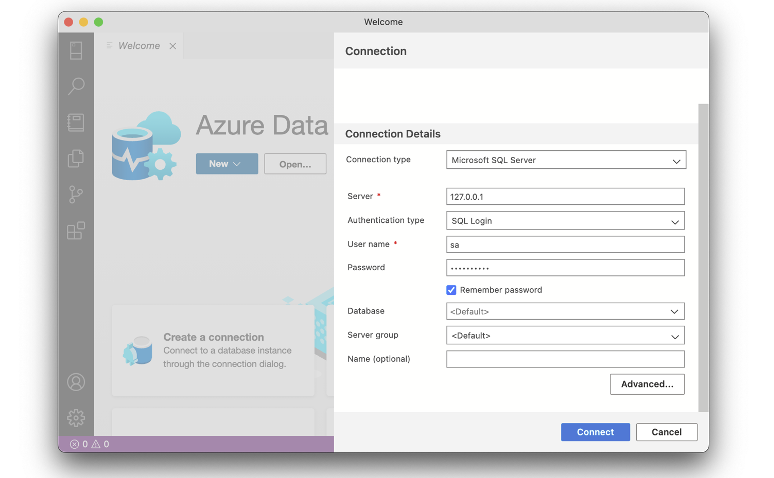
Click “Create a connection”
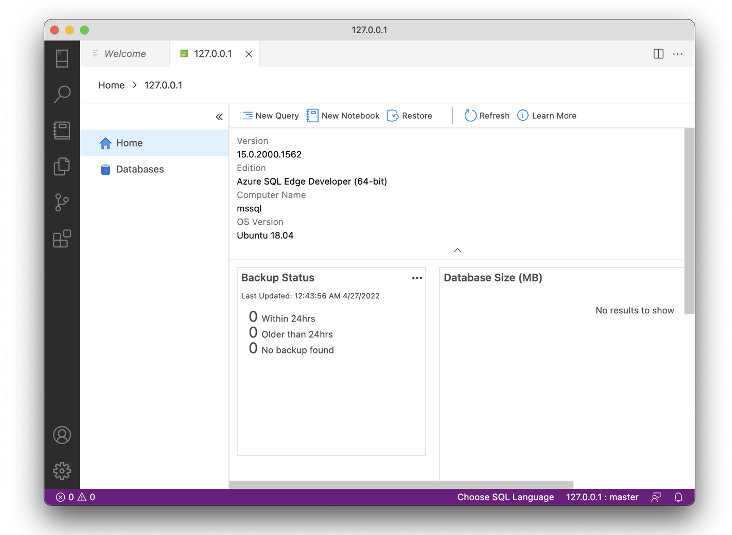
If everything goes well, you should see we connected sql server successfully.
Database restoration on SQL Server: Download AdventureWorks2017.bak database backup file from https://learn.microsoft.com/en-us/sql/samples/adventureworks-install-configure?view=sql-server-ver16&tabs=ssms
Copying the AdventureWorks2017.bak backup file from MAC downloads folder to docker container
- Go to MAC terminal then type docker ps . Here containerID will get displayed.
- docker cp ~/Downloads/AdventureWorks2017.bak CONTAINER_NAME:/var/opt/mssql/data/AdventureWorks2017.bak
- Replace the CONTAINER_NAME in step2 with containerID displayed in step1. Example: docker cp ~/Downloads/AdventureWorks2017.bak 38974d1:/var/opt/mssql/data/AdventureWorks2017.bak
- Once completion of copying backup file from MAC to container.
- Go to Azure Data Studio then create a new query , make sure you have enabled preview features in Azure Data Studio to get new query option.
- Run below database restore command.
- RESTORE DATABASE AdventureWorks2017 FROM DISK = ‘/var/opt/mssql/data/AdventureWorks2017.bak’ WITH MOVE ‘AdventureWorks2017’ TO ‘/var/opt/mssql/data/AdventureWorks2017.mdf’, MOVE ‘AdventureWorks2017_Log’ TO ‘/var/opt/mssql/data/AdventureWorks2017.ldf’, STATS = 5; – Display progress every 5 percent
- You have successfully restored the database AdventureWorks2017.
SQL Server installation video on MAC: https://cityuseattle.github.io/docs/database/sqlserver-mac/